I’ve had my eye out for a VW 1.9 TDI engine with a 5 speed manual transmission and the vehicle it came in was not that important. I had predominately looked at the Jetta but when a good price came up on a Passat, I changed my thinking and went with the Passat. The price I paid for it indicated that it probably wasn’t in the best shape, but when I picked it up in Ocean City MD, I was surprised at how nice the interior was. It was when I started it up that it pointed to why the price was so good. Diesels are a bit noisy, but this thing was a real clacker, but in any event I figured I would just go through the engine and see what it needed to get it up to snuff.
As I drove home I was already thinking about rebuilding the engine just so I knew what I had but was going to see if there was something less involved that might quiet it down.
Well a couple of days after I got the car the timing skipped leaving me dead in the water and needed a tow. Fortunately, being an interference engine, (meaning that if the timing belt breaks, valves and pistons collide) it only jumped two teeth and not enough to do any damage.
New timing belt on and all is well, or at least as it was before. . .
[kaltura-widget uiconfid=”535″ entryid=”1_pc0mpfsc” width=”400″ height=”330″ addpermission=”” editpermission=”” /]
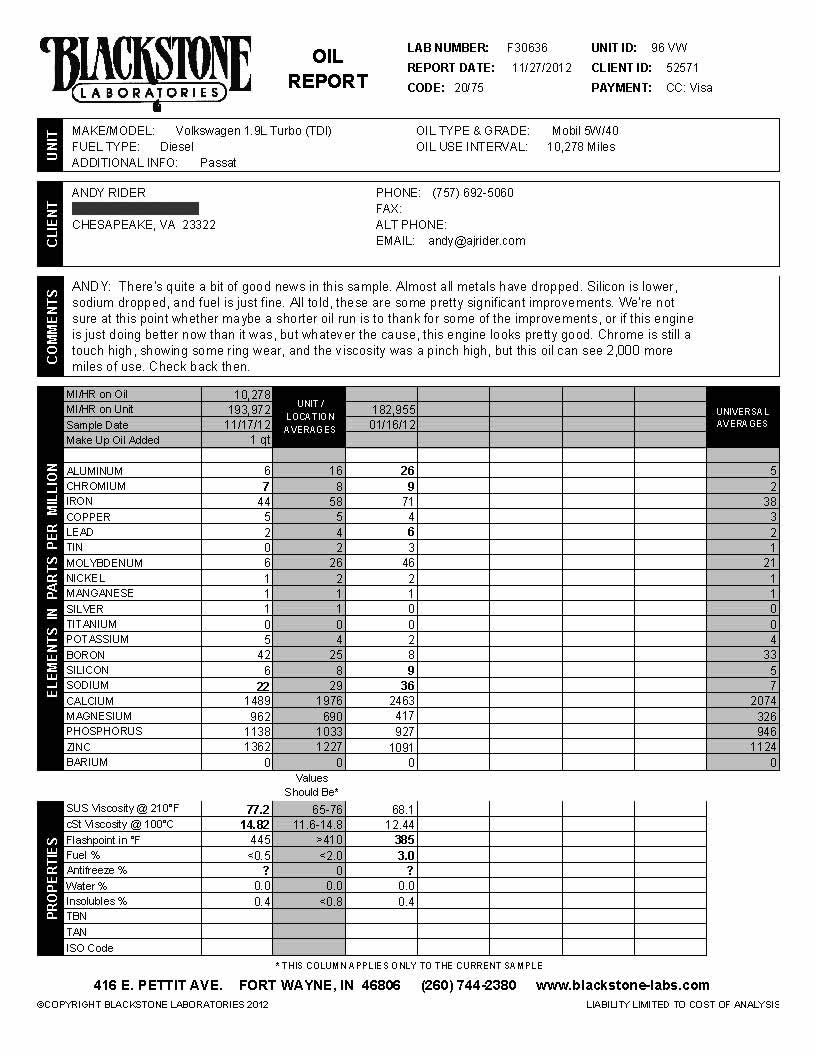
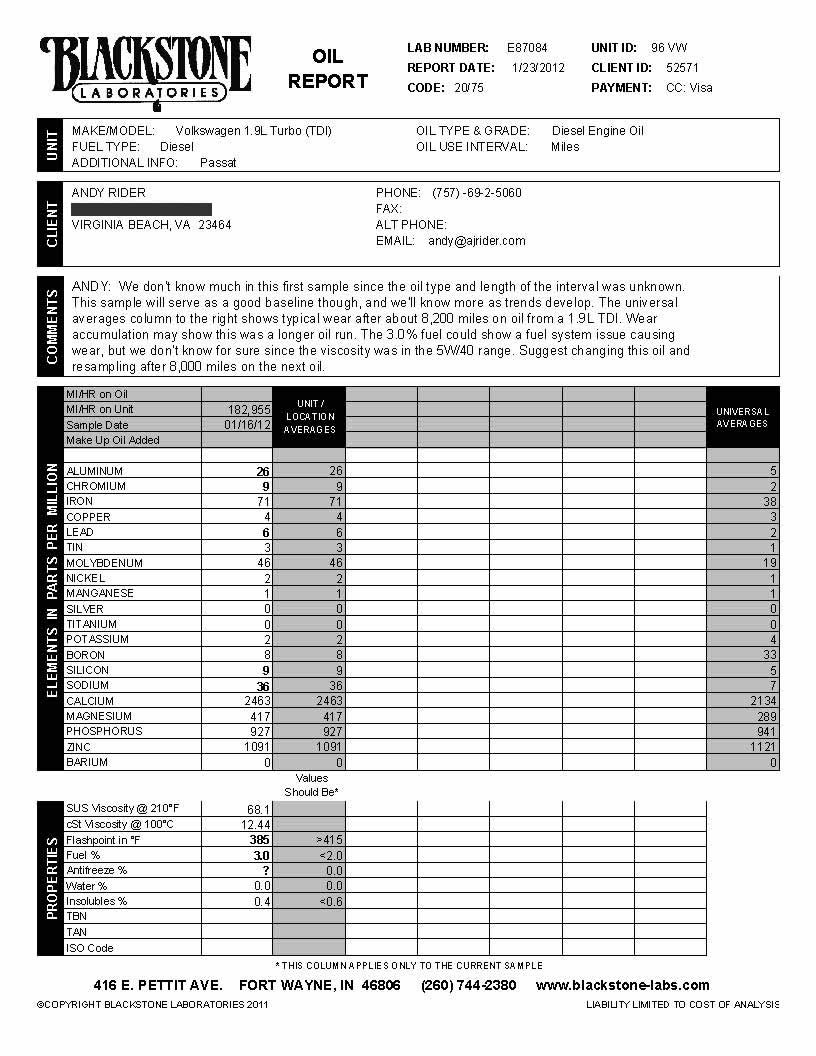 Took an oil sample and sent it out to have it analyzed and it showed high wear metals and 3% fuel in the oil as well. This was still the oil that was in the car when I bought it and would represent what has been going on in the engine. Well, first off you can see that the aluminum was 5 times what it should be and that would indicate a problem with a piston. Chromium was pretty high too indicating a ring problem. Moly was high and could indicate a bearing issue. Sodium was high and usually comes from coolant which could indicate a head gasket issue as well. Something was wrong other than just a knock. . .
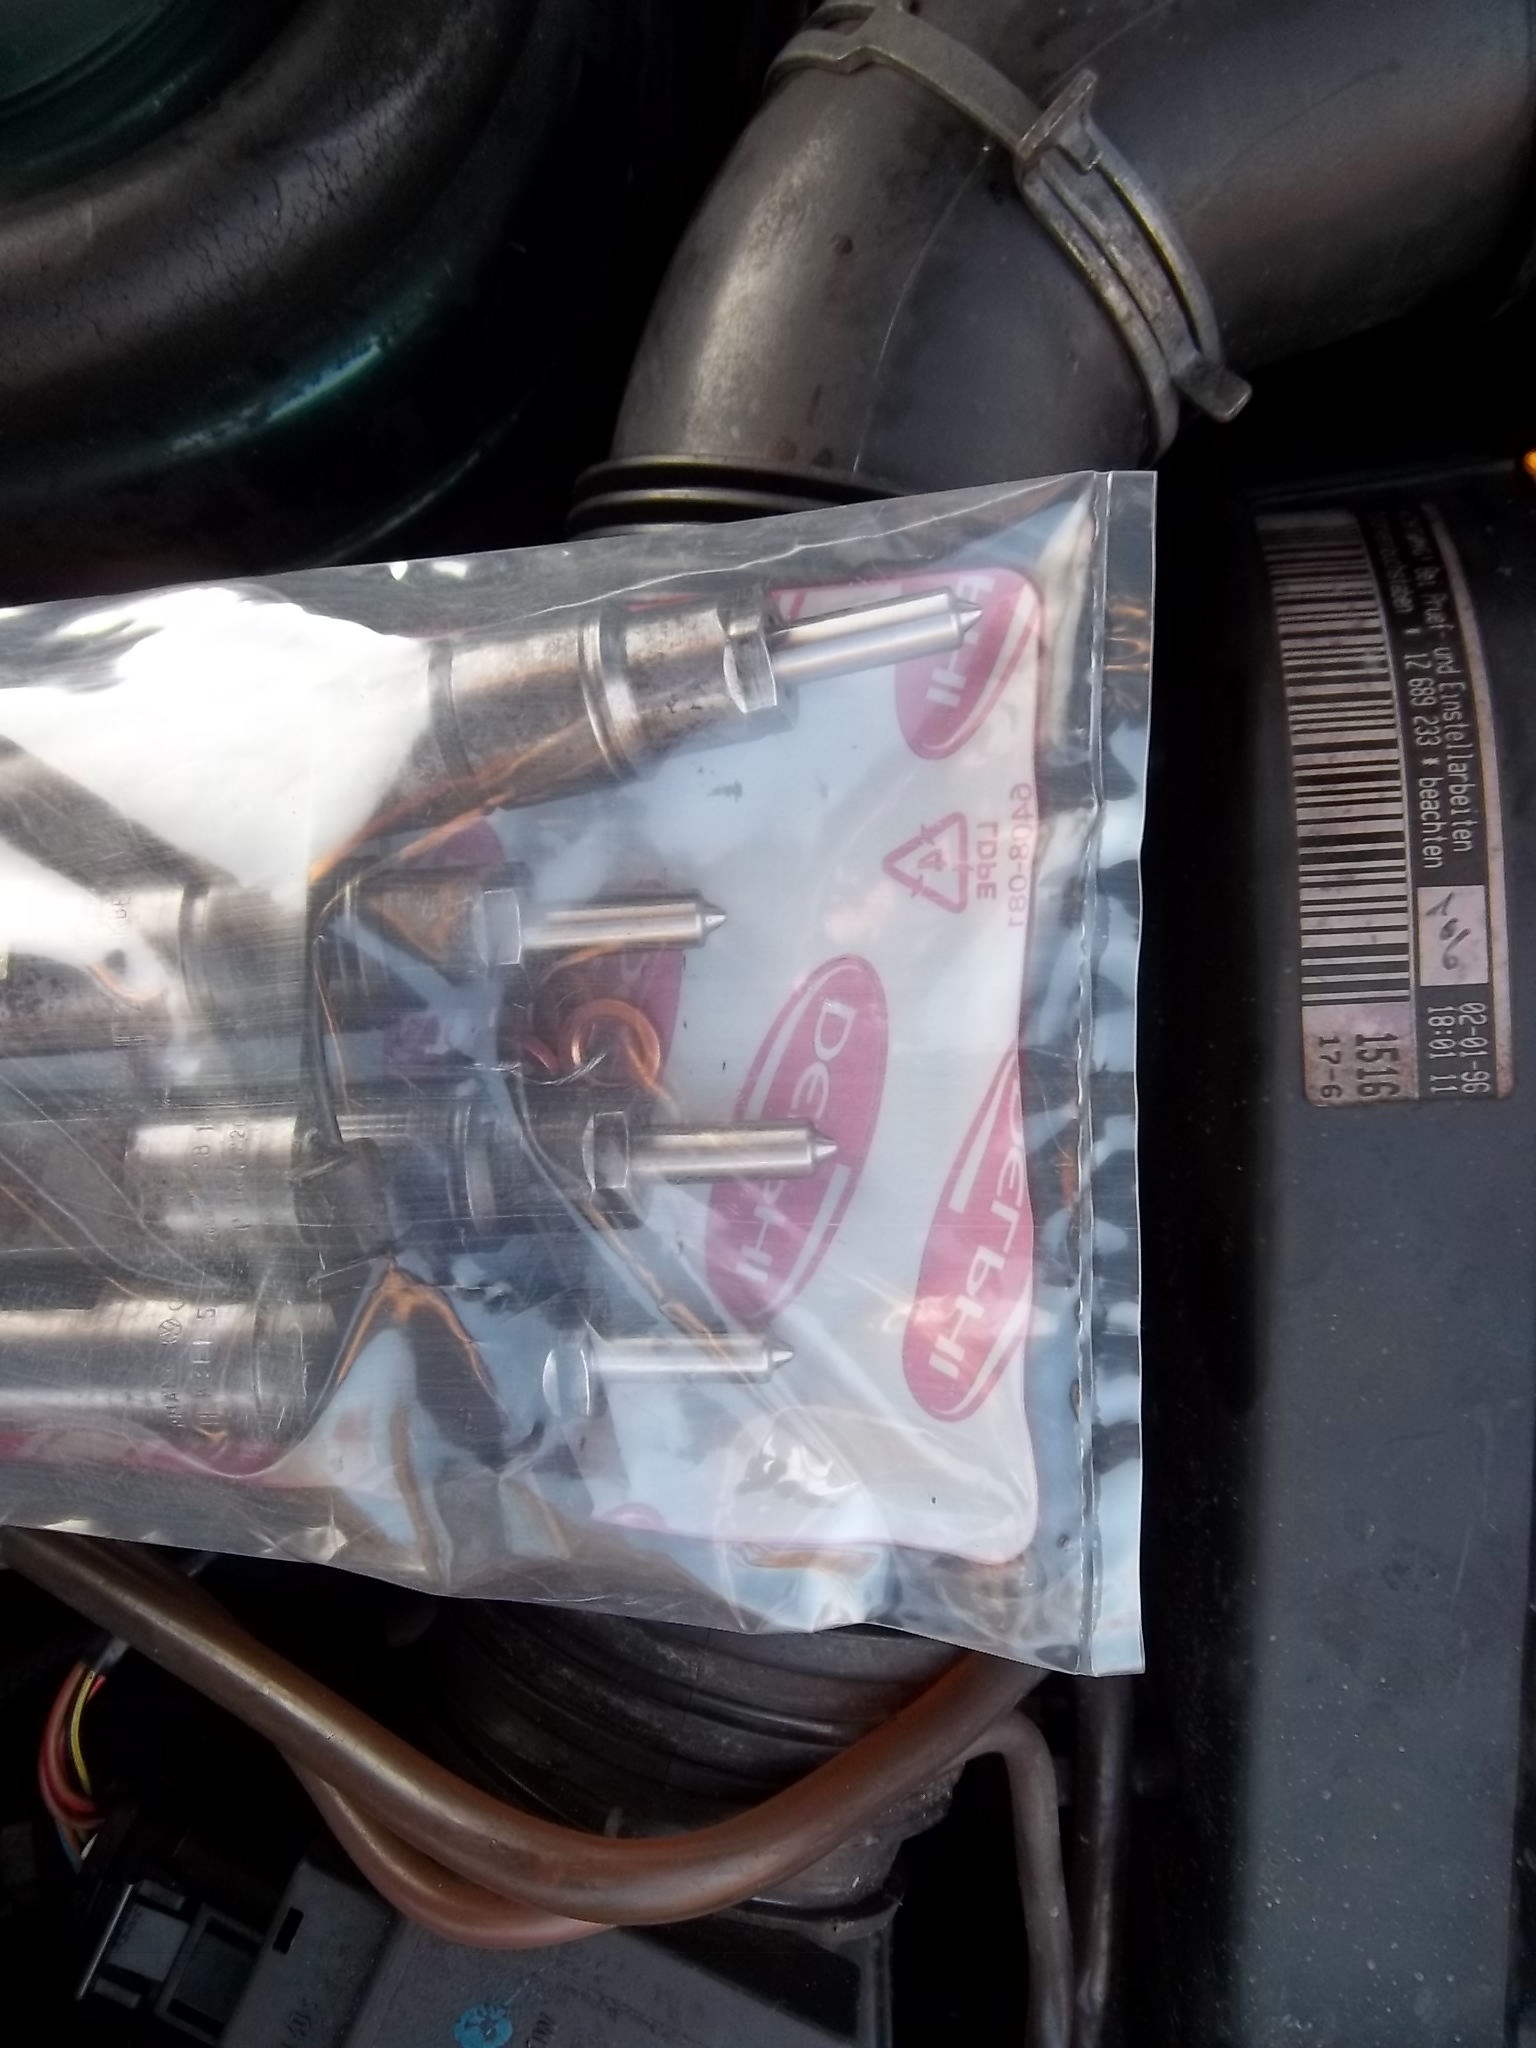 Through researching the service manual, VW states that a faulty injector can result in a knock that resembles a rod knock and with that I replaced the injector nozzles as this also needs to be done about every 100k miles and it was doubtful that this was ever done.
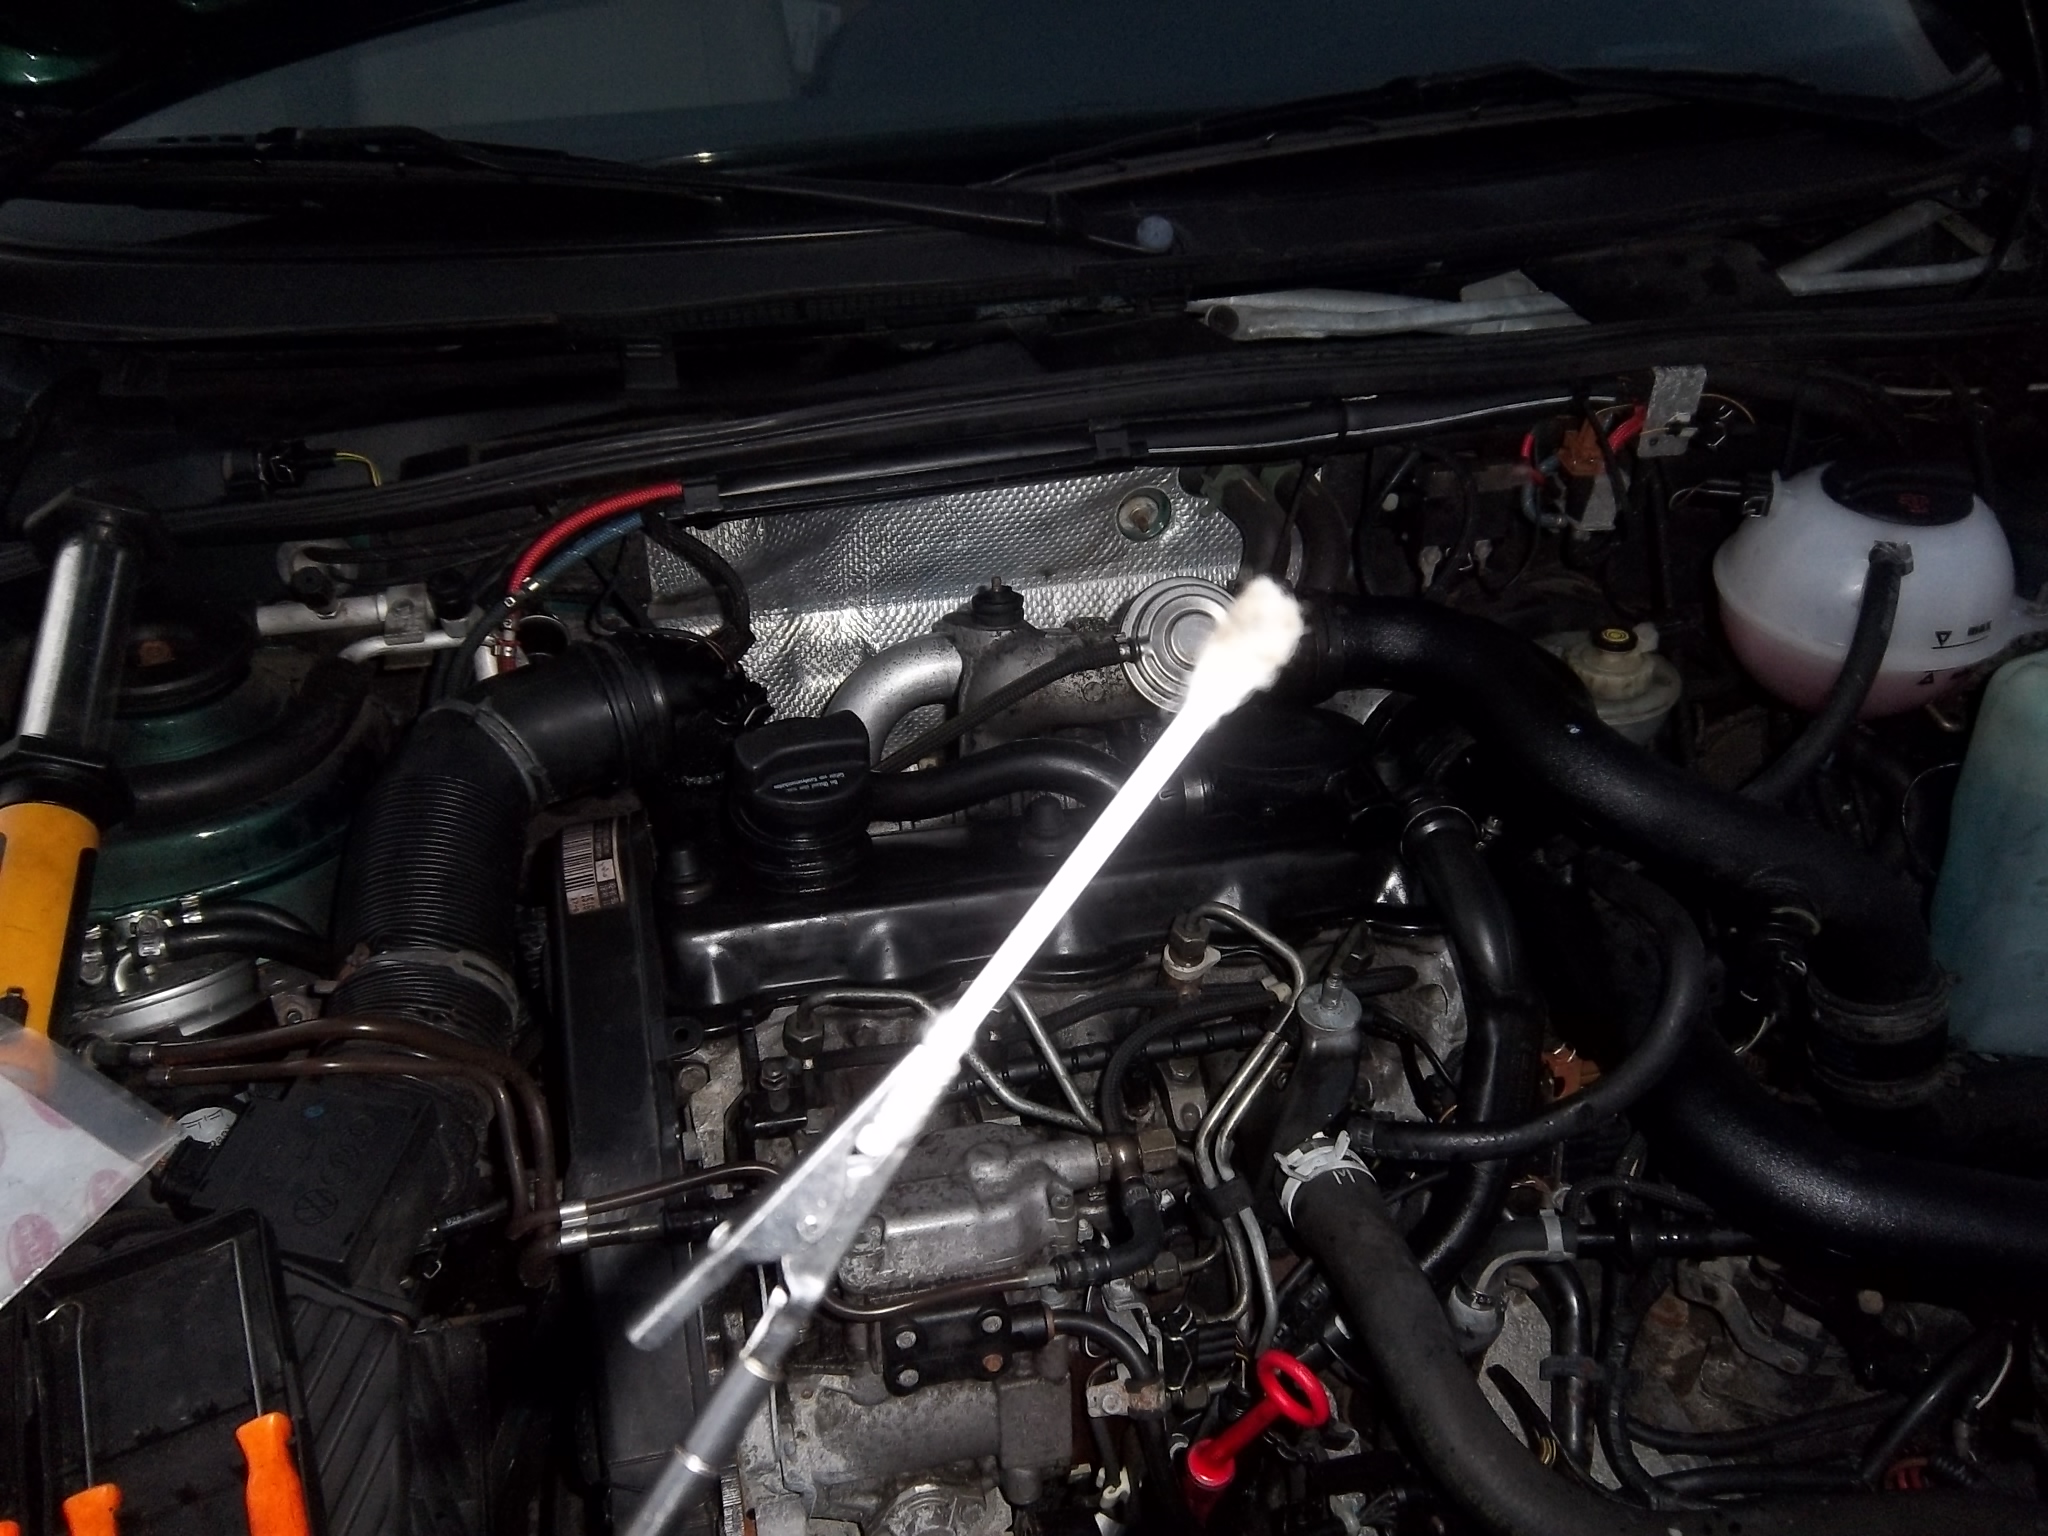 The injector seats needed to be cleaned which was accomplished by using Q-tips soaked with 2 + 2 carburetor cleaner and an extension to get down into the seats.
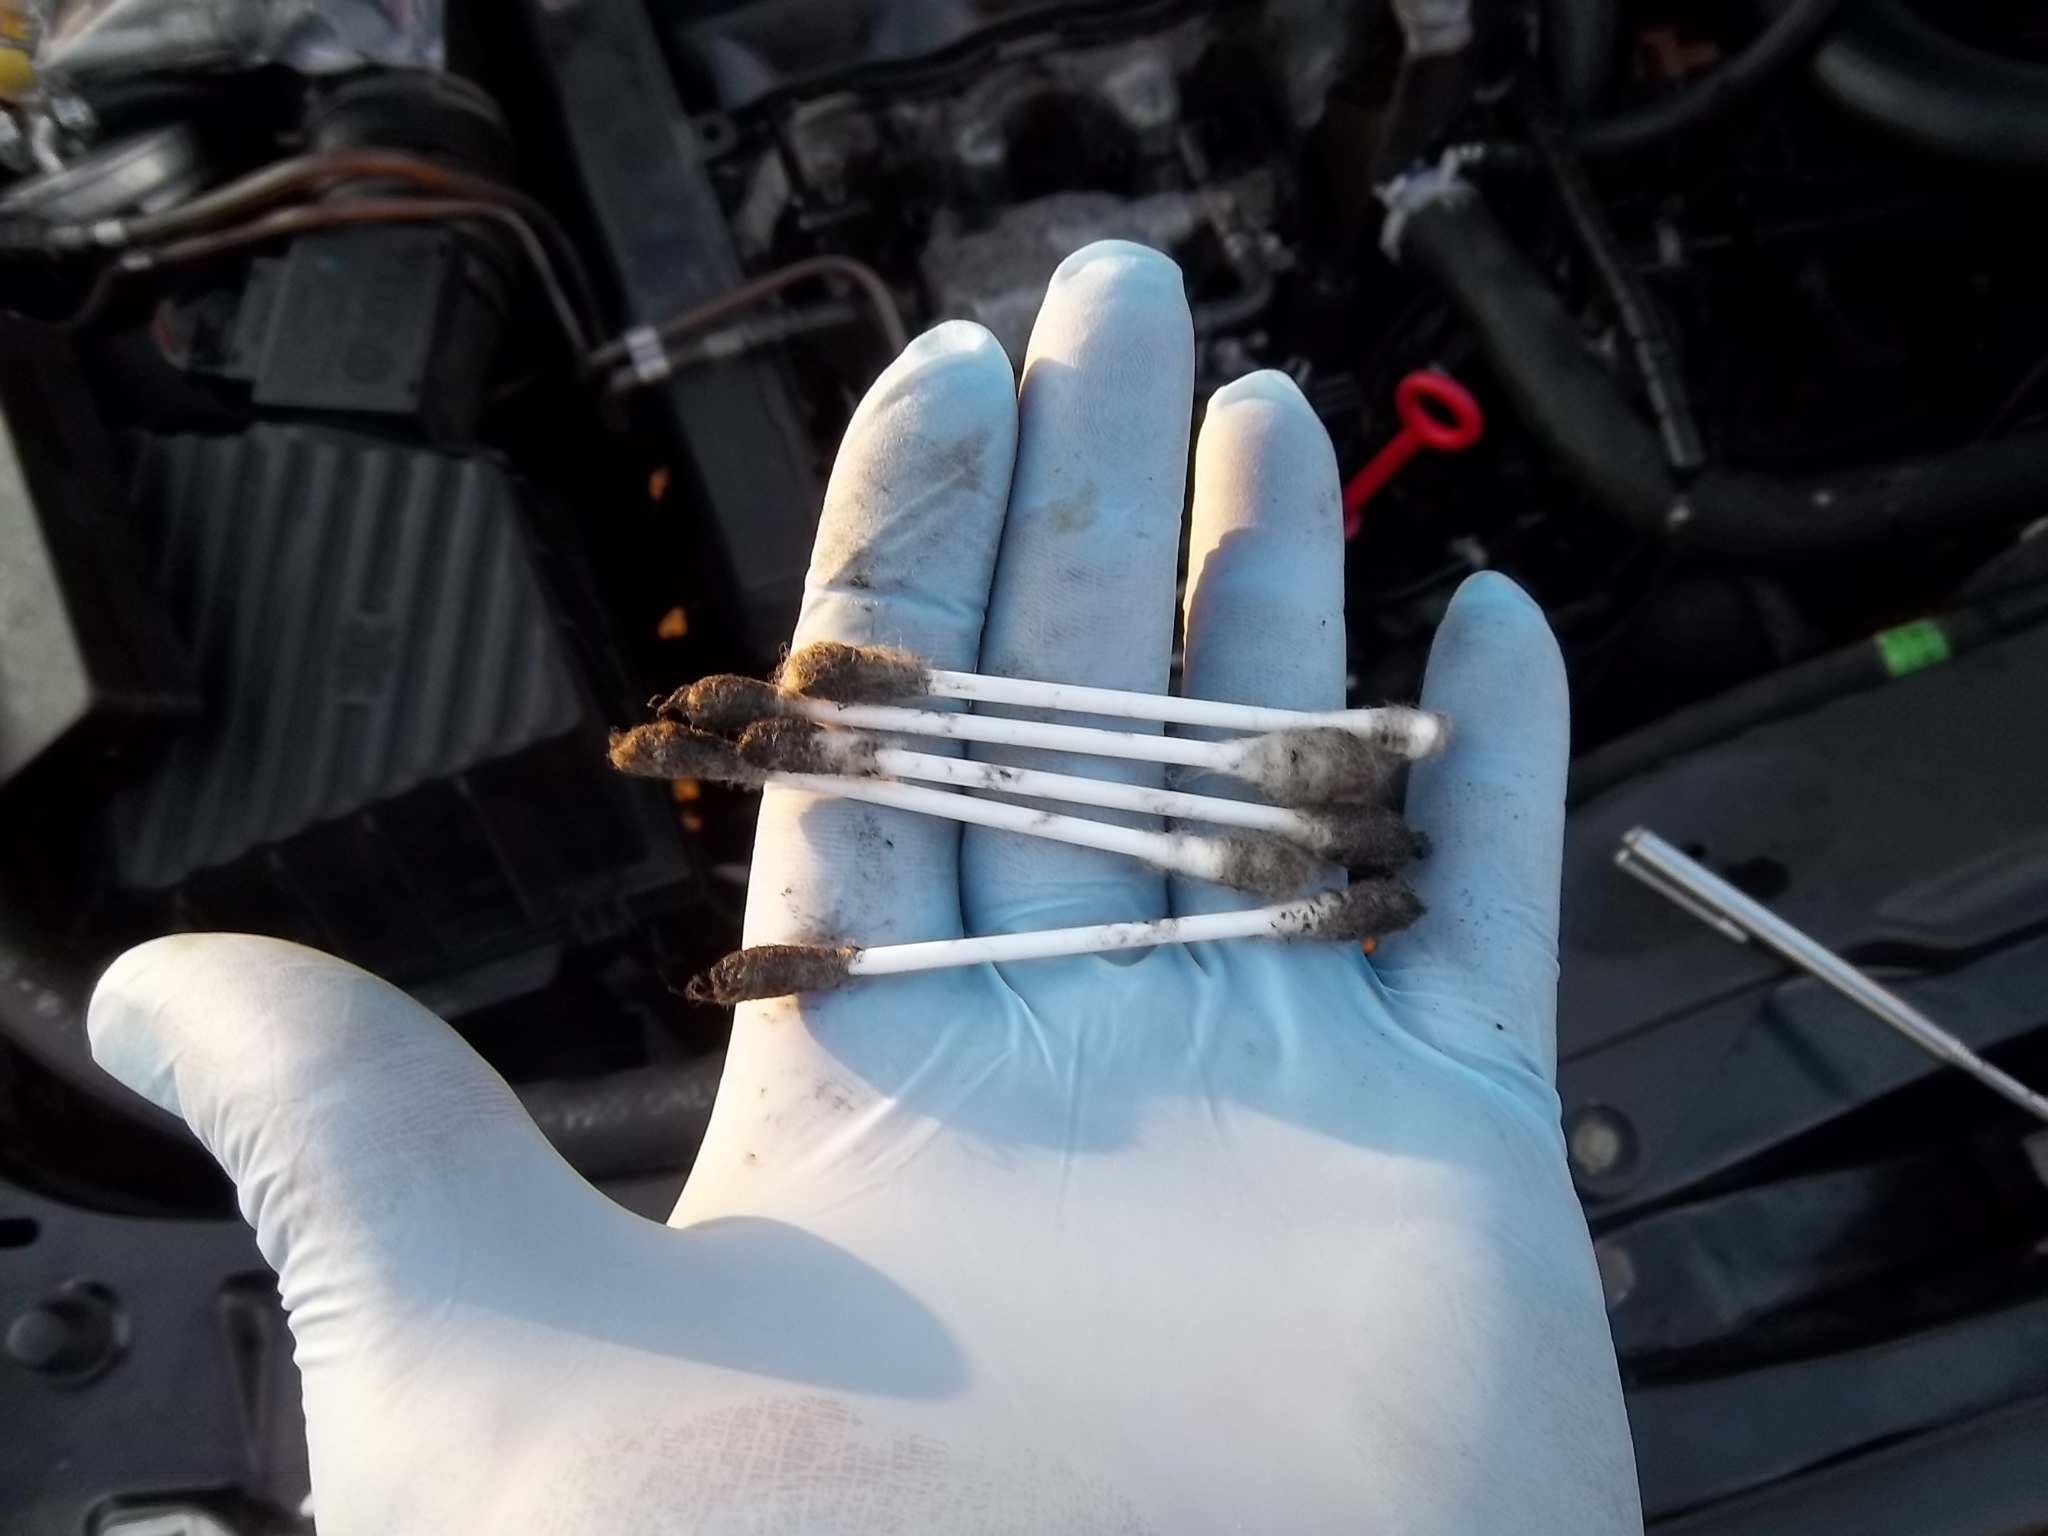 It took several Q-tips but eventually the seats were clean. Also had one crush ring still stuck in cylinder 3, but was able to remove it without damaging the seat.
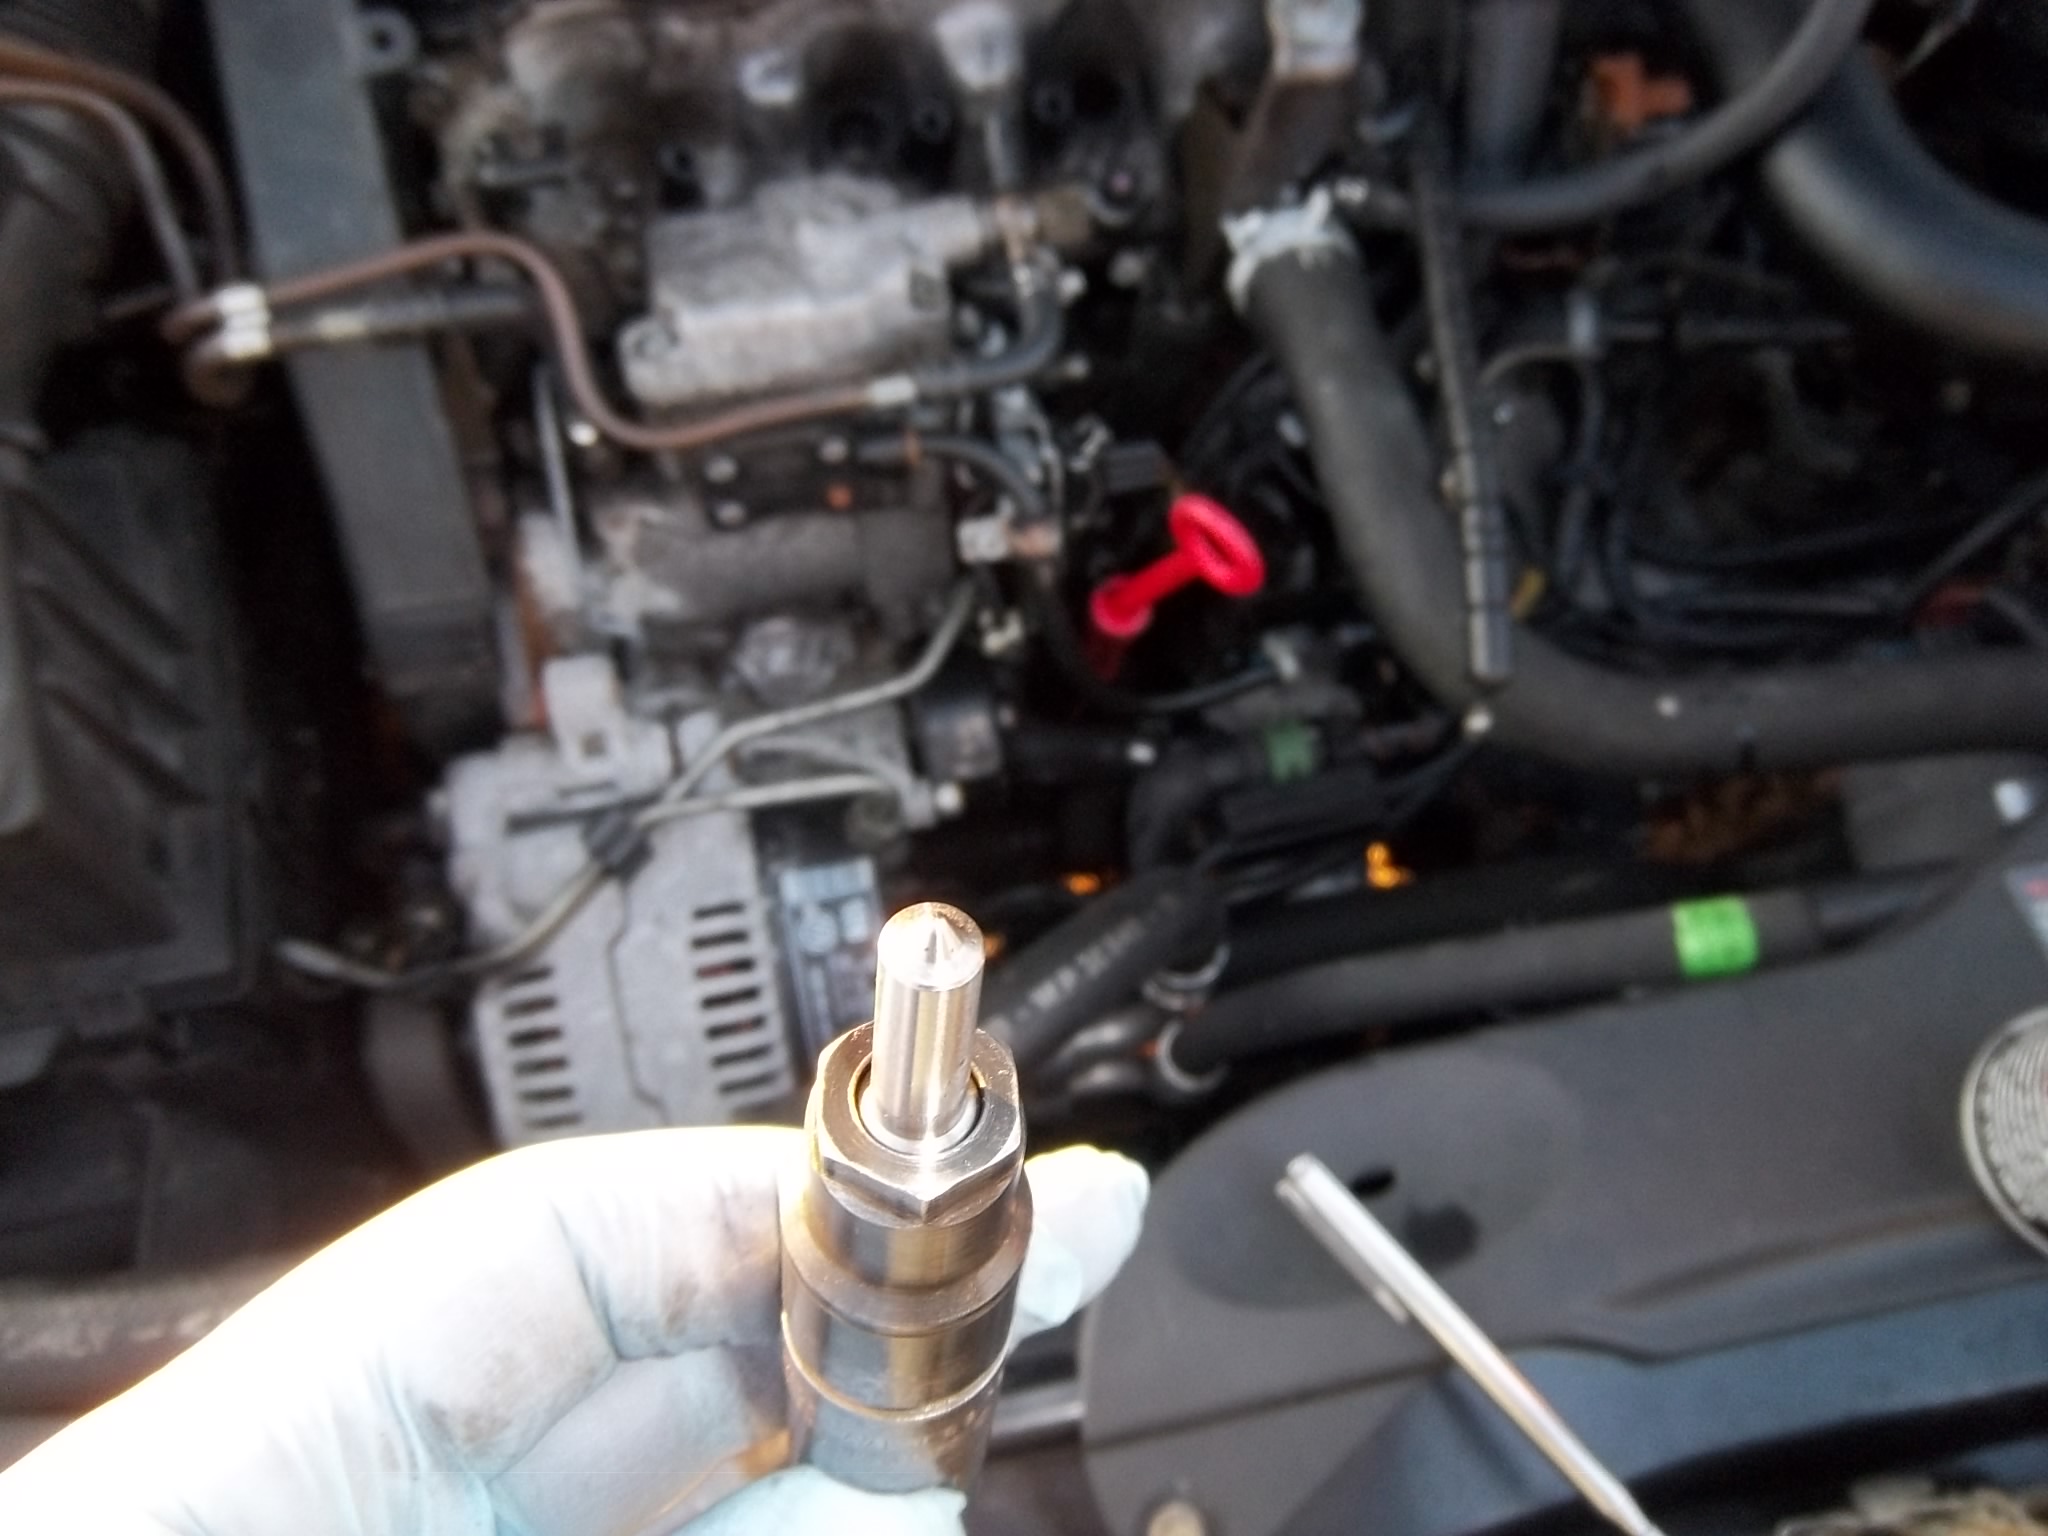
To the right is a pic of one of the injectors with the new nozzle.
Well, new nozzles in and the knock continues but the engine runs great. Also did an oil change just to get the engine cleaned up inside.
Now comes the time to crack it open and see what’s going on in there. .
 You can click on this pic to see the full size, but with the head off, nothing obvious was seen other than a bit more of a carbon buildup on piston one which is on the end of the engine that was making the noise.
With the head off, I took it to the machine shop to have it checked and cleaned.
It was a couple of days before I was able to get into the bottom end to dig a little deeper.
With the oil pan off and oil pump out, the pistons were popped out and our problem started to reveal it’s self.
 In case you can’t see it, look at the number one piston on the right
 There’s your problem . . . but wait there’s more.
You would expect this to be accompanied by a some result to the cylinder wall as well.
Here you have it. . .
 Spent some time honing the cylinders to break the glaze and spent a bit more time on cylinder one being careful not to damage the oil jets for each cylinder.
With cylinder one, I even ran the hone from the bottom of the block, through the crank shaft to make sure I got the bottom of the cylinder as good as I could.
 And all cylinders honed
  even though only cylinder one has been wiped out.
Having found the bad piston, I’ve decided to replace them all with a full set.
Stopped by the machine shop and the only thing they found was that the valve guides could stand to be replaced which they are going to do along with new seals and should have it done in the next day or so.
With any luck and good shipping, everything should be here this weekend to start the reassembly and by the beginning, to middle of this next week we should have it turning again.
Well, the parts came in and got the pistons dropped in. You can see that the new pistons have a coating on the skirt and you can also see the recess in the bottom of the piston, top left in this pic, where the oil cooling jet goes. This recess wraps around the jet each time the piston comes down.

The last piston going in using a ring compressor and the butt of a rubber mallet to tap them in


and all pistons in and ready for the head, or is it. . . The pistons project above the block at top dead center (TDC) and the head is flat which leaves the head gasket to make up the difference. They have three different head gaskets for this engine depending on the piston projection.
Engine code 1Z
Piston protrusion
Identification
Holes/notches
0.91 mm to 1.00 mm / 1
1.01 mm to 1.10 mm / 2
1.11 mm to 1.20 mm / 3
In other words, from (.0358 inch – .0393) is one gasket (.0397 – .0433) is the next and (.0437 – .0472) is the third. Putting it another way, each gasket covers a protrusion of roughly 4 thousandths of an inch.

 The first pic was one of the first attempts to get the projection but as it was different every time, I finally used a piece of 1″ aluminum angle and I was then able to get consistent readings putting me in the range of the 2 notch gasket. Now after the head is torqued it would seem that the piston comes within 3 thousandths of an inch from hitting the head each time it comes up. . . which means that you probably couldn’t get your fingernail in there.
Got the head on and torqued and didn’t have the camera when I was setting the head, but cleaned the deck up again and cleaned out the bolt holes and made line up pins out of two of the old head bolts by cutting the heads off and cutting slots to be used to screw them out after the install and used a magnet to pull them back out. These were inserted in the back two holes, one on each end as per the book.
 The head was torqued with new torque to yield bolts, the book said to do so with all the pistons below TDC. After this was done, I held my breath as I rotated the engine by hand through TDC a couple of times and then alined the crank at TDC and installed the cam with the alinement tool installed to ensure that it was in the proper position. After the cam was torqued, I just rocked it back and forth a bit through TDC and back to make sure that no valves were hitting and then installed the timing belt and hand cranked it again for two full revolutions to make sure that everything was still clear.
Then came the turbo and intake and the first start. . . hoping that the original knock was in fact gone, and woo hoo, no knock here!!!
[kaltura-widget uiconfid=”535″ entryid=”0_j5inwb2e” width=”400″ height=”330″ addpermission=”” editpermission=”” /]
The break in for this engine is to run it hard for about 40 – 50 miles, shifting at 4k and loading the turbo up. It made me cringe to do so knowing how tight the clearance was between the head and piston even though I knew that speed wouldn’t increase the chances of anything hitting. In any event, after the break in of about 50 miles, the oil was drained and new filter installed and filled with Mobile One Turbo Diesel oil. The original factory oil change interval for this type of oil is 30k but I’ll be taking a sample at about 5k to have it tested.
 Well, didn’t do an oil test at 5k like I planned. When you buy a new 1.9 TDI I’ve been lead to believe that you can void the warranty if you change the oil before 10k so with that, I just did a test at 10k. We have been duped into believing that we need to change our oil every 4 to 5 thousand miles and studies have shown that changing you oil too often can actually be detrimental to you engine, but that’s another issue altogether.
In any event, the aluminum is down where it should be. Now the chrome is a little high but that is to be expected as the rings seat. Along with the aluminum, the iron, while half of what it was, is still a bit high and that is to be expected during the ring seating as well. With new rod bearings, the moly has dropped significantly. Sodium is still a bit high even though it has dropped. As this was an in-frame procedure, I wasn’t able to completely flush or boil the engine out and there is likely to be residual in there that will dissipate with the next oil change. As the oil is synthetic, it will have at least 15 to 20k on it when it’s changed and I’ll post the next oil report then.
Before the in-frame major I was getting 45 mpg but the first tank after the in-frame I only got 44.5 mpg. They say that it can take anywhere from 10k to 20k to get the rings fully seated at which time the mileage should settle out. With that I expect to see it improve slowly over time.
Installed a new exhaust, got it inspected and really enjoy driving it now.