 |
It was the end of 2004 and I was doing a job in a government building and I saw a promo that said "use biodiesel". After a little cranial scratching, I called my brother who uses a good bit of diesel to see what he knew. He had heard of it but that's about it. I started doing research on the net to see what this was all about. It entailed collecting waste veggie oil from eat-m-up joint that had been used to cook fries and the like. This sure sounded like a mess! Who would really do something like this? As the price of fuel and diesel increased, I began to understand who would do mess with this waste oil.. folks like me that feel that the going rate for diesel is just too much. With my work truck (2004 GMC 3500) and my car 91 Mercedes 350sd, I was paying about $1000 per month for diesel. This had to stop. With that I began to do more research and started by doing the "world famous Dr. Pepper Technique" and after several test batches, the first of which was unsalvageable, I started putting together a reactor. The following assumes that you already have a basic understanding of biodiesel. There seems to be a wealth of information already on the net and for me to include that here would be redundant. What I will do is identify what I find works the best as I learn and improve. For more information on making biodiesel, here are just a few of the sites that can help
Now I know that this looks like a cluster, but it's a work in progress. |
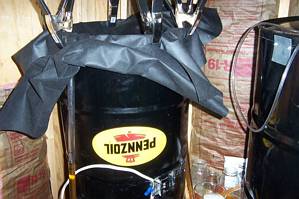
A couple of oil drums turned upside down and then a few things welded to them. The first batch of oil I got was pretty nasty but I didn't realize it until I got it home and started to work with it. The titration was off the scale and the stuff smelled like death warmed over. Drained it out of the reactor, (drum on the left) and had to cut the top off the drum to clean the sludge out. Lesson #1 Always titrate a new source of oil before you pick it up. Birth of the "trunk titration". |
| Found another source of oil and did the "trunk titration" out of the trunk of the car and determined that it was usable oil. With that I went back and got the truck and picked up about 35 - 40 gallons. Now it was time to get this thing working. |
To the left of the sight glass I've welded a 1" coupling that has a water heater element screwed into it. To the right of the sight glass I've for a 3/4" nipple welded to the side to us as a product drain. This is about 1" off the bottom to avoid any residual mess that might still be lurking after the glycerol draining. Up and further to the right I have a couple of pieces of 3/4"x3/4" angle welded to hold a water heater thermostat which is controlling the heating element. That's what I've started with and have a long list of modifications that I already see I have to make. |
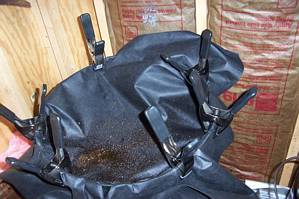
Lesson # 2, Pre filter oil before pouring into the reactor. I was all excited now. After a few weeks of gathering parts and putting mess together, tearing it apart and modifying, brainstorming and all, I was ready to roll with oil to do a full batch (22.7 Gallons). As I was pouring the oil in I noticed that it looked pretty good and about that time bits of chicken breading and other chunks of mess went tumbling into the reactor. Well, I drained it again and stuck my head in there and cleaned it out again!!! How do I strain this mess??? What do I have that will work??? Ah Ha!! I've got more landscaping fabric than I will ever use and with that, I cut a piece off the roll and using some big spring clamps, I made a make-shift pre-filter. |
 |
 |
With the glycerol drained off it was time to move the product to the wash tank. Not being real tickled about the landscaping fabric, I searched for other options and ended up at McMaster and got some 50 micron and 25 micron filter bags. I ordered them over the net and the next day they were sitting on my porch. Can't beat that!!! The plan is to run the next batch through the 50 micron bag into the reactor in lieu of the landscape fabric. Through the 25 micron bag into the wash tank and finally through the 10 micron filter into the car/truck fuel tank. |
During the third wash, I started the bubbler to add a little extra scrub to the batch. I stopped the bubbler and let it sit a bit and drained the water off down to a little of the fuel. I then started the bubbler again+ and turned the heat back on and within three hours on a day when it was pouring outside, it was so clear you could see the bottom of the tank. |
I had about half a tank which is about 10 gallons and I put in another 10 gallons which makes an approximate B50 grade. Note the 5 gal bucket in the pic above. It does have some BD sitting on top of the last bit of wash water that was drained. Behind the bucket to the right there is a coffee can. By pushing this coffee can into the bucket, it alowed the BD on top to fill the can and it was then stored and added back into the next wash batch. We don't let any BD get away!!!
|